
Again, can’t think of a apt title so there.
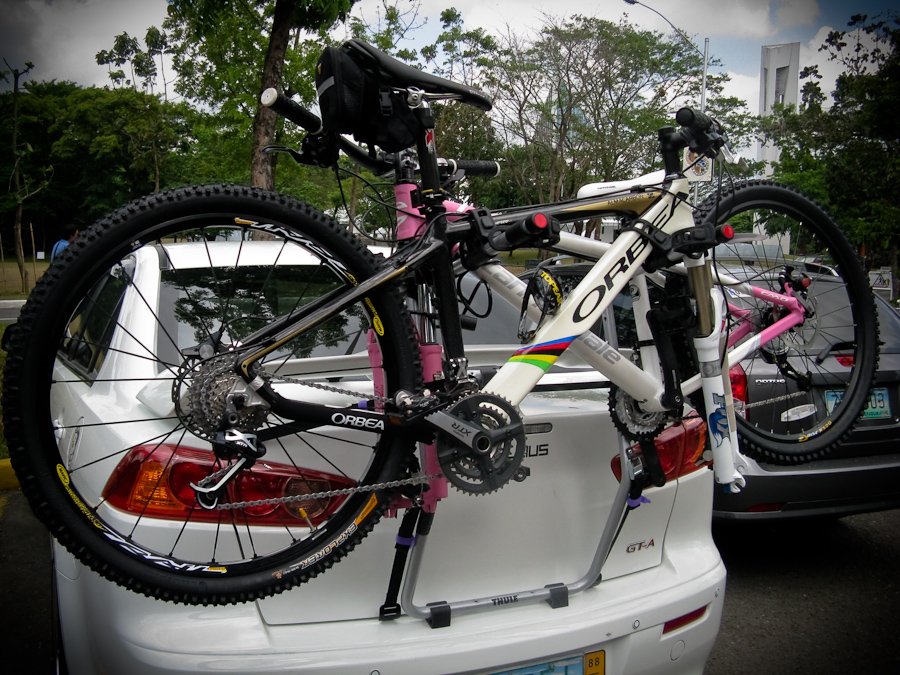
I’ve decided that its too much of hassle to use my trunk-mounting bicycle rack for carrying the bikes.
- It takes a good 5-10 minutes to set the rack up and make sure everything’s nice and tight. 1 You don’t want something like that coming lose while driving
- Trunk is rendered “unusable” from the outside at that point; I have to spend another five minutes organizing the backseat to collapse (allowing access to the trunk from the inside 2 Not to mention the challenge of moving my pillows. etc.
- Mounting the actual bikes to the rack is also a challenge; I have to make sure the pedals, forks, etc. are positioned a certain way so that it’s easy to tighten down and not have them scratching each other.
- All this is usually done in the sun…
#3is done at least 4 times 3 Mounting, unmounting when we get to the venue, mounting before you go home, unmounting when you get home - Speed of driving is severely hindered; anything past 60 and you can feel the rack rocking…
So I decided to “retire” it and get a proper system despite the risk of botching up the look of my car. Practicality won this time.

I’m glad my car “design” (distribution of black and white elements) is the way it is; I really expected it to look much worse… but it actually looks decent. The “gains” with the new system are:
- The bike racks are rated to 130kph; which is still slow for me, but I’d take that over 60-70 anytime. Just sucks to know I can only go 130 tops on a highway during a trip to say, Baguio.
- It literally takes about 20 seconds to take a bike on/off.
- The “lock” is integrated on the mount, so I don’t need an extra cable lock to secure the bike.
- The “base system” can be used for other storage solutions (not just biking) so it’s like “future-proofing” in a sense.
- Thule has this “One Key System” available which changes the locks to work with one key.
#5 is particularly interesting because that’s really the reason why I’m posting. I purchased the 8-lock One Key system. I set everything up that I’m now using all eight locks the system. 4 Two locks on each side of the bars (4), two locks on each bike rack (to secure a rack to the bar, and to secure a bike to a rack) . And all I have to carry around is one key for everything.
Unfortunately, if you need more, you’ll need to buy a new one-key system again… so that’s +1 key now. Or you can sell the old 8-key and get a new set that has more (12? 16? etc). Not only do they not sell a 16-key system here yet, but what if you go past that? Isn’t it too much expense (the lock sets are quite pricey, I think the 8-lock set is 3.5k)? What if I buy more Thule storage stuff? I’ll be “out of LOCK” so to speak hehehe.
Fear not, I’ve found a solution. You can use the stock Thule locks (provided they are the same types of locks) that come with any Thule item you buy and have it work with your One Key system key with some McGuyvering. Without further ado, here’s a tutorial for Thule users:
Extending / Making your own Thule One Key system
Below are the materials you’ll need:
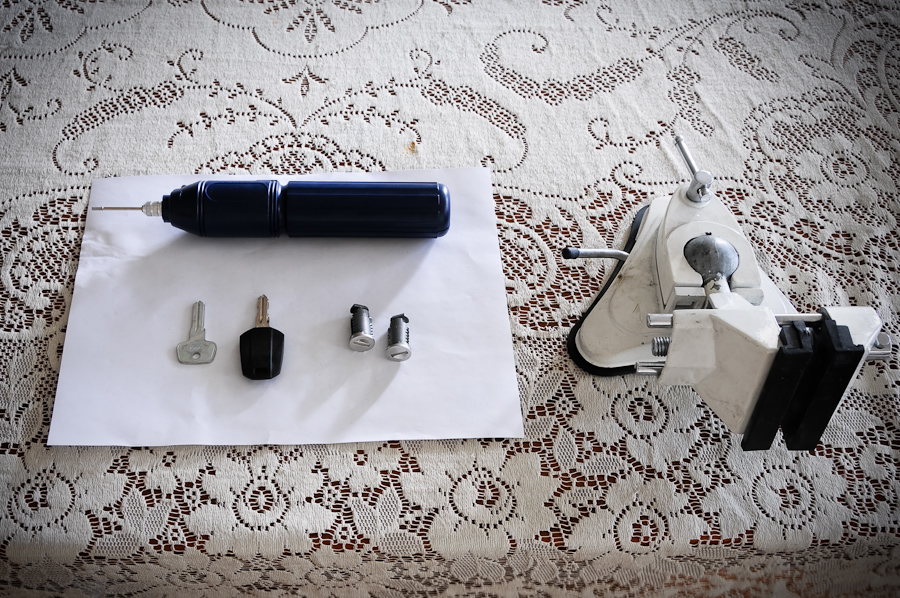
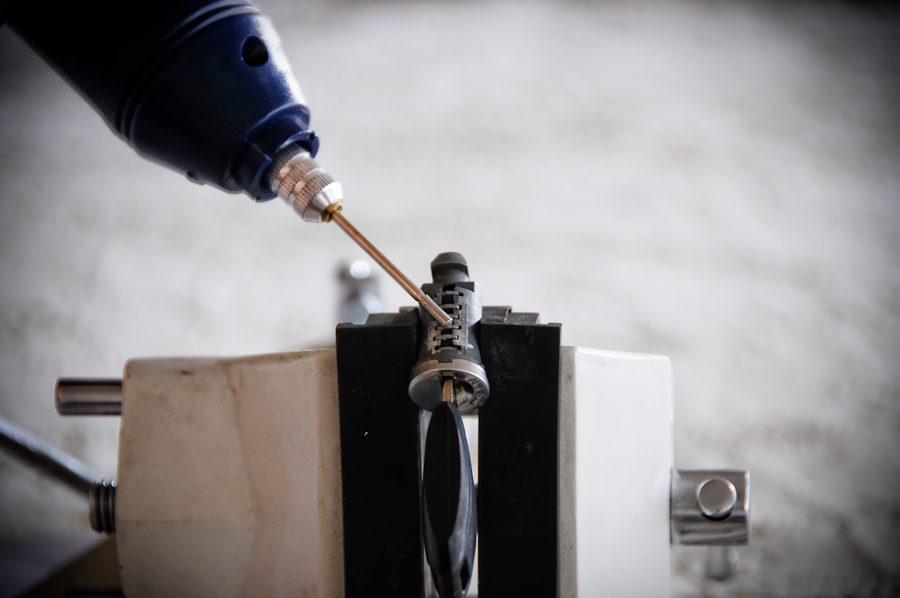
- Any power tool that can “sand” metal down
- Key you want to use the locks with. I suggest you buy at least one One Key System because it comes with “nice” keys (the one with the black head in the picture)
- Vise/clamp/3rd arm (optional)
- Of course, the locks to be “victimized”
- Master key 5 Not to be confused with the One Key System key; the master key is a groove-less key that allows you to swap locks out of Thule products. (optional)
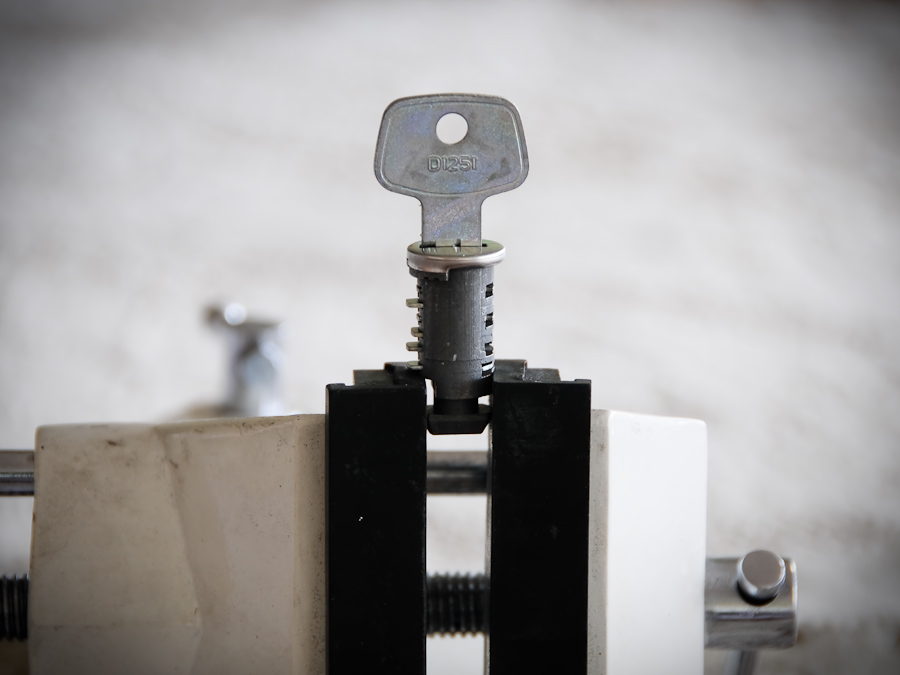
Understanding the mechanics of Thule locks.
By design, Thule locks are interchangeable. This makes it possible to sell One Key systems as replacement locks. The only thing you need to replace locks is the “master key” mentioned above. Their design is extremely simple: The whole lock barrel is designed to twist around its containing product. Naturally it can only turn when its sides are smooth… which is what the keys do.
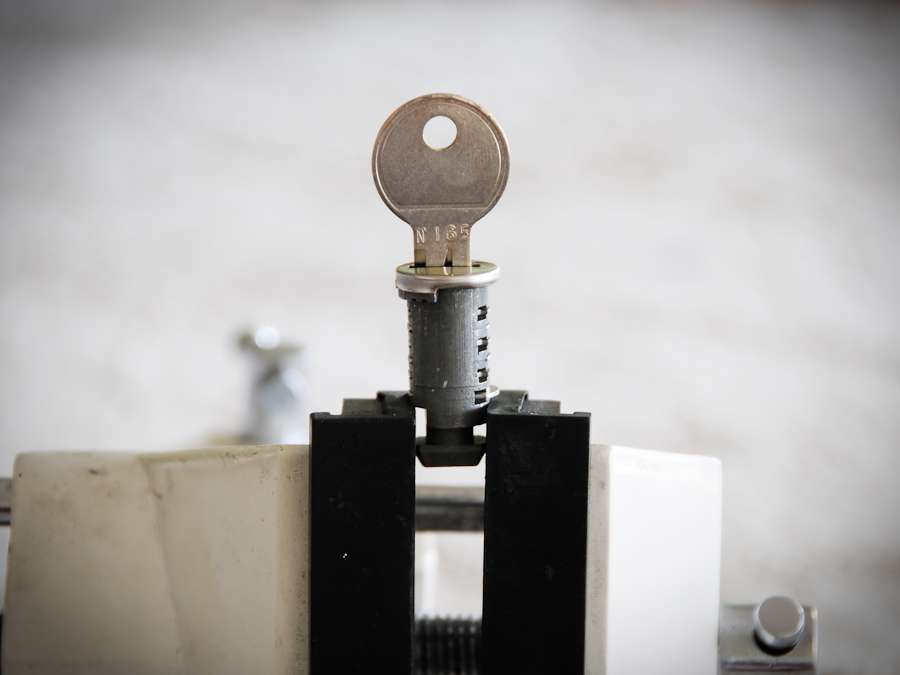
So here’s a sample lock with an incorrect key: 6 And the reason I suggest you get at least one One Key system; the generic key looks like shit. Besides, you’re already going to “cheat” anyways, so might as well pay for something for a little saving grace.
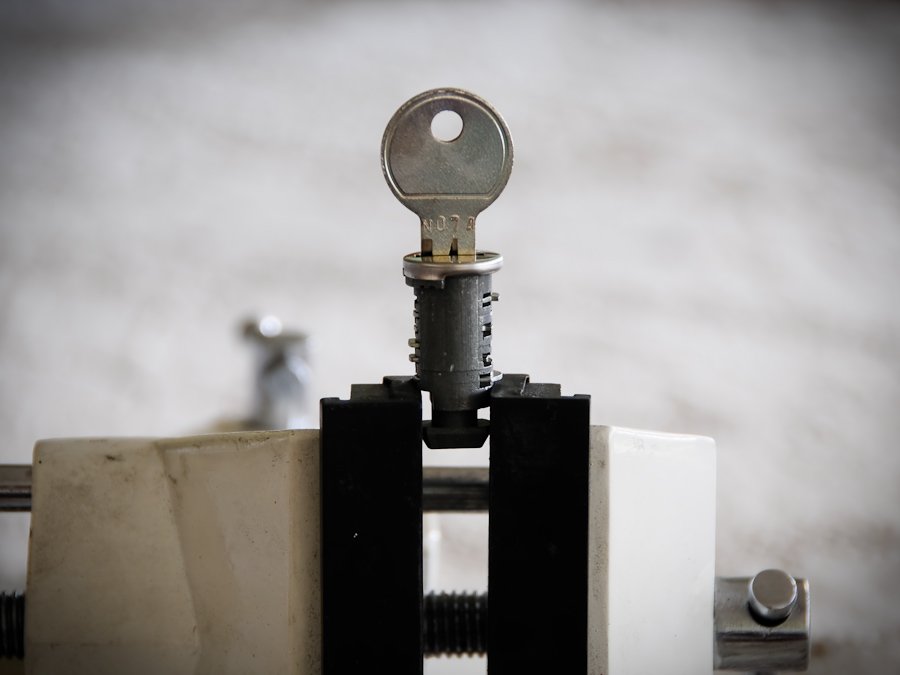
And with correct key:
That “stub” in the bottom (by the vice) is the actual “lock” that makes it possible to move your Thule locking components. So naturally if you twist the whole thing a certain way, it “unlocks” the component. Hence the goal is basically to make sure it’s all smoothened out when you insert the key you want to be using; so that when you twist it, it can be twisted.
Here’s what your “victim” lock should look like when the key you want to use is inserted:
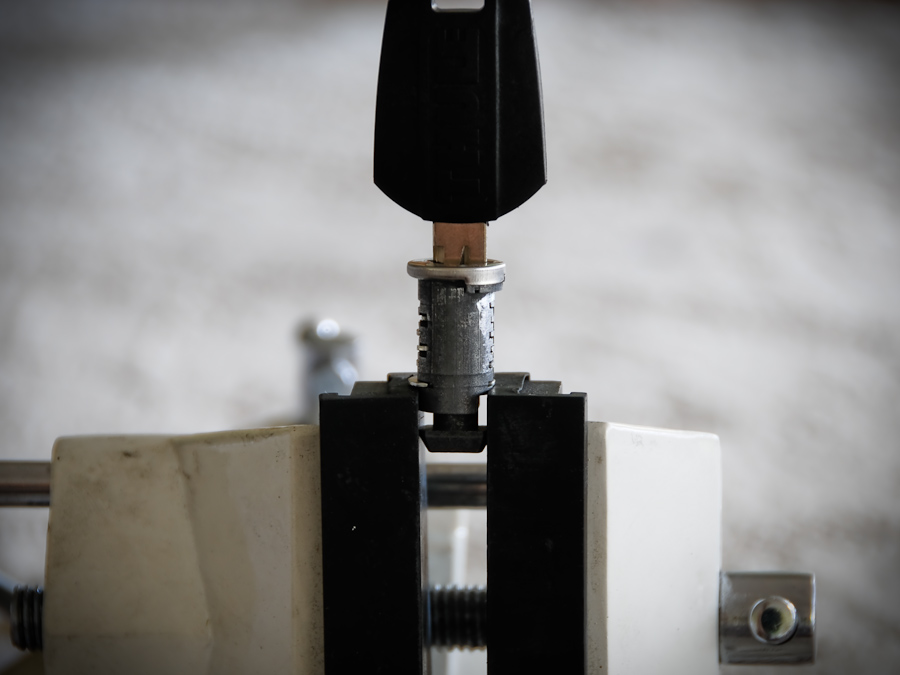
That’s it! Told you it was easy… and you’ll never run out of lock-barrels again; whenever you buy Thule equipment, you can just modify the barrels that come with them.
Just one thing to remember, just touch the first 5 metal plates from the key-socket. That very last, longer metal plate is for the master key; which serves a whole different purpose as I mentioned earlier. Just make sure you don’t mess with that; just stick with the 5 smaller plates… and make sure to smoothen out both sides.
Notes
| ⇡1 | You don’t want something like that coming lose while driving |
|---|---|
| ⇡2 | Not to mention the challenge of moving my pillows. etc |
| ⇡3 | Mounting, unmounting when we get to the venue, mounting before you go home, unmounting when you get home |
| ⇡4 | Two locks on each side of the bars (4), two locks on each bike rack (to secure a rack to the bar, and to secure a bike to a rack) |
| ⇡5 | Not to be confused with the One Key System key; the master key is a groove-less key that allows you to swap locks out of Thule products. |
| ⇡6 | And the reason I suggest you get at least one One Key system; the generic key looks like shit. Besides, you’re already going to “cheat” anyways, so might as well pay for something for a little saving grace. |